Deploying Supabase Migrations with GitHub Actions
Deploying database migrations efficiently is a crucial aspect of maintaining a smooth development workflow. Manual deployment can lead to inconsistencies, errors, and delays. Automating this process using GitHub Actions ensures that changes are applied consistently across environments without human intervention. This guide walks you through setting up a GitHub Actions workflow to automatically deploy Supabase migrations to your acceptance and production environments, streamlining your development cycle.

Prerequisites
Before getting started, ensure you have:
- A Supabase Acceptance project set up and running.
- A Supabase Production project set up and running.
- A GitHub repository for your project.
- A basic understanding of GitHub Actions and YAML syntax.
- Supabase CLI installed (Supabase CLI Setup)
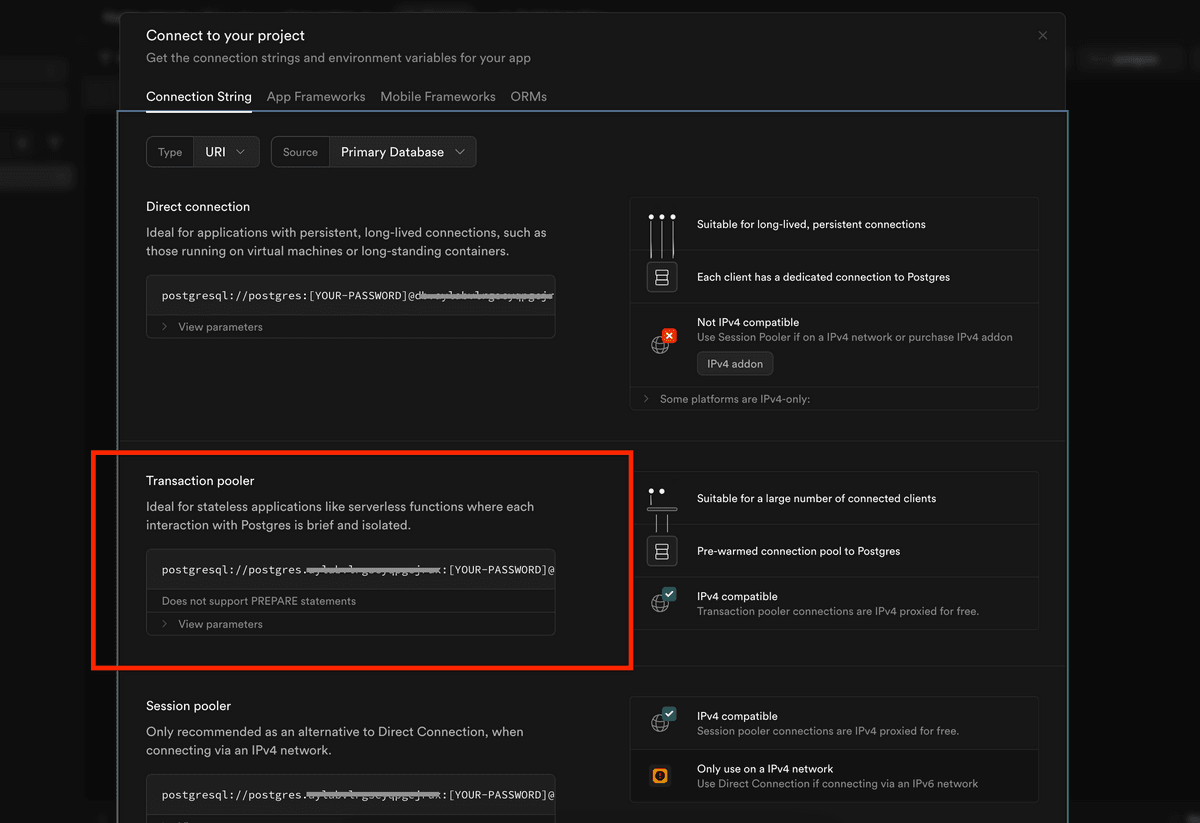
- Database connection URLs for both acceptance and production environments.
Step 1: Configure Supabase Credentials in GitHub Secrets
To securely store credentials for database access, follow these steps:
- In your GitHub repository, navigate to Settings > Secrets and variables > Actions.
- Click New repository secret and add the following secrets:
SUPABASE_ACCESS_TOKEN: Your Supabase personal access token, which allows authentication with Supabase. You can generate one at Supabase Access Tokens.SUPABASE_DB_URL_ACCEPTANCE: The database connection string (Transaction Pooler) for the acceptance environment.SUPABASE_DB_URL_PRODUCTION: The database connection string (Transaction Pooler) for the production environment.
These secrets will be accessed within the GitHub Actions workflow to apply migrations securely.

Step 2: Define the GitHub Actions Workflow
Create a new workflow file in .github/workflows/deploy-supabase.yml with the following configuration:
name: Deploy Supabase Migrations

on:
  push:
    branches:
      - main
      - acceptance

jobs:
  deploy:
    runs-on: ubuntu-latest
    steps:
      - name: Checkout repository
        uses: actions/checkout@v4

      - name: Install Supabase CLI
        uses: supabase/setup-cli@v1
        with:
          version: latest

      - name: Set database URL based on branch
        run: |
          if [ "$GITHUB_REF" == "refs/heads/main" ]; then
            echo "SUPABASE_DB_URL=${{ secrets.SUPABASE_DB_URL_PRODUCTION }}" >> $GITHUB_ENV
          else
            echo "SUPABASE_DB_URL=${{ secrets.SUPABASE_DB_URL_ACCEPTANCE }}" >> $GITHUB_ENV
          fi

      - name: Apply Supabase migrations
        run: supabase db push --db-url $SUPABASE_DB_URL
This workflow is triggered whenever a commit is pushed to the main or acceptance branches. It checks out the repository, installs the Supabase CLI, sets the appropriate database URL based on the branch, and applies the migrations.
Step 3: Push Migrations to GitHub
Once you have created or modified a migration in Supabase, push your changes to GitHub for the workflow to execute:
supabase migration new "add_users_table"
git add supabase/migrations/
git commit -m "Add new migration"
git push origin main  # or acceptance
This ensures that the new migration is included in the repository and will be automatically applied when the workflow runs.
Step 4: Monitor the Deployment
To ensure your migrations are deployed successfully:
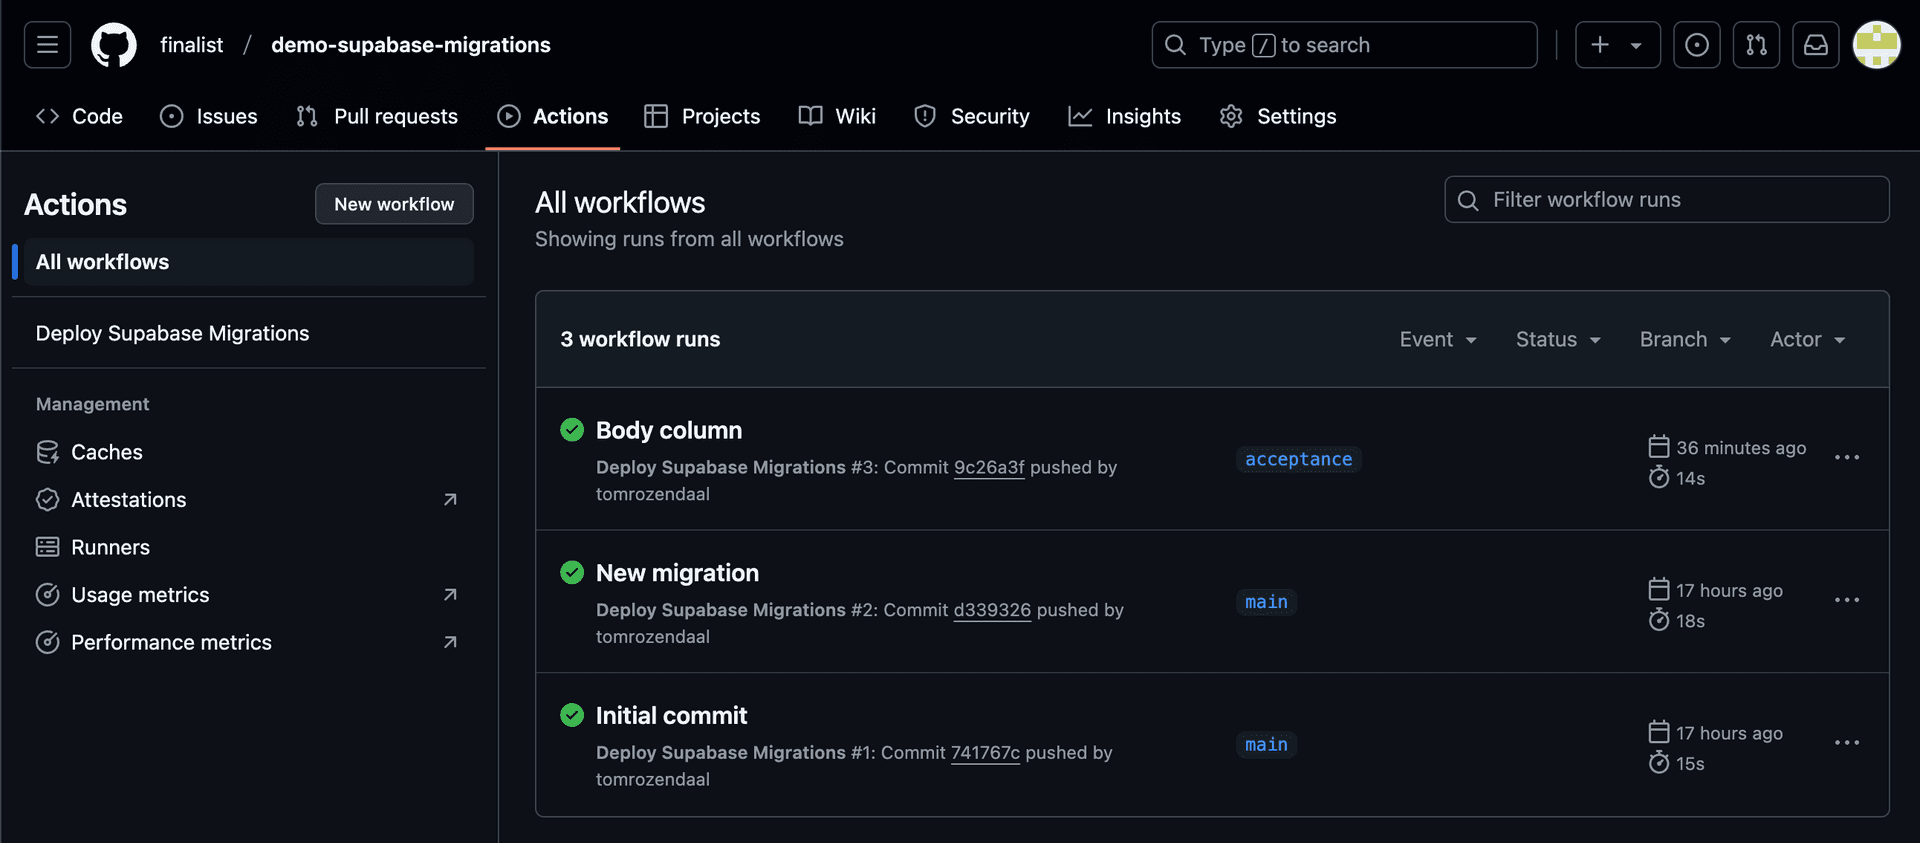
- Navigate to the Actions tab in your GitHub repository.
- Click on the latest workflow run corresponding to your push event.
- Check the logs for any errors or confirmation that migrations were applied successfully.
If an error occurs, review the logs, update your migration files if needed, and push the fixes to the repository.

Conclusion
With this setup, every push to main deploys migrations to production, while pushes to acceptance update the acceptance environment. This automation improves efficiency, reduces human errors, and keeps database migrations in sync with application code. By leveraging GitHub Actions, teams can maintain a seamless CI/CD pipeline for database changes, ensuring a robust and scalable development process.
For a working example, check out our public GitHub repository: demo-supabase-migrations.
